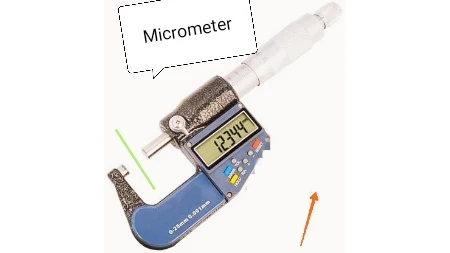
This SOP is for the steps of calibrating and operating of micrometer so you can get accurate results every time.
1.0 OBJECTIVE
1.1 To provide the guidelines for the operation, maintenance, and calibration of a Digital Micrometer.
2.0 SCOPE
2.1 This procedure applies to the Digital Micrometer used in the packaging laboratory of quality Control.
{tocify} $title={Table of Contents}
3.0 RESPONSIBILITIES
3.1 QC Chemists Lab analyst follows the SOP.
3.2 Head- QA, and QC for implementation of SOP.
4.0 Operating Procedure
4.0 Clean the faces of the anvil and spindle with cloth or paper then bring them together carefully by turning the ratchet stop. If the line marked ‘0’ on the thimble does not coincide with the reference line of the sleeve, adjust the zero position in the following manner.
4.2 Deviation within & over ± 0.01 mm (0.001”): adjust the sleeve & then press the zero button until. The reference line coincides with the “0” line of the thimble.
4.3 Before every application check the instrument for zero position.
4.4 Turn the ratchet stop in an anticlockwise direction. Then keep the object of which thickness is to be measured between two faces of an anvil, and bring it close to each other carefully by turning the ratchet stop clockwise to hold the object sufficiently.
4.5 Check the reading on the digital screen.
4.6 Least count of the Digital Thickness Gauge is 0.001 mm and its maximum capacity is 25 mm.
5.0 Cleaning And Maintenance
5.1 Handle the instrument with care.
5.2 Regularly clean the instrument with a dry cloth.
5.3 Keep the apparatus in the cabinet box when not in use.
6.0 Calibration Procedure
6.1 Instrument calibration must be performed within a calibration window of ±7 days from the due date of calibration,
6.2 Calibrate the instrument through an external agency.
6.3 Calibration Frequency Yearly & External Agency.
7.0 Safety Precautions
7.1 Handle the micrometer with care to avoid damage to its delicate parts.
7.2 Do not over-tighten the micrometer onto objects to prevent damage and inaccurate readings.
8.0 ABBREVIATION
SOP:
Standard Operating Procedure
QA:
Quality Assurance
QC:
Quality Control
CM: Centimeter
9.0 REFERENCE:
Refer to the manufacturer's manual for specific calibration and operation guidelines.


